DIY Carburetor Cleaner: Revive Your Engine with Household Solutions
A sputtering engine, poor fuel economy, and rough idling – these are all telltale signs of a dirty carburetor. For many, the immediate reaction is to reach for a commercially available carburetor cleaner. However, what if you could achieve the same results with readily available household items? This article delves into the world of DIY carburetor cleaner solutions, providing a step-by-step guide to safely and effectively cleaning your carburetor using common ingredients. We’ll explore the pros and cons, discuss safety precautions, and arm you with the knowledge to decide if a DIY carburetor cleaner is the right choice for your engine maintenance needs.
Understanding the Carburetor and Why It Needs Cleaning
Before diving into the recipes, let’s understand the carburetor’s role. The carburetor is responsible for mixing air and fuel in the correct ratio to create a combustible mixture for your engine. Over time, varnish, carbon deposits, and other contaminants can build up inside the carburetor’s intricate passages, restricting fuel flow and disrupting the air-fuel mixture. This leads to performance issues like those mentioned earlier.
While modern vehicles primarily use fuel injection systems, carburetors are still found in many older cars, motorcycles, lawnmowers, and other small engines. Regular cleaning is essential to maintain optimal performance and prevent costly repairs. While professional carburetor cleaning services are available, they can be expensive. That’s where the appeal of a DIY carburetor cleaner comes in – offering a cost-effective alternative for tackling this maintenance task.
DIY Carburetor Cleaner Options: Recipes and Methods
Several household solutions can be used as a DIY carburetor cleaner. Here are some popular options, along with detailed instructions:
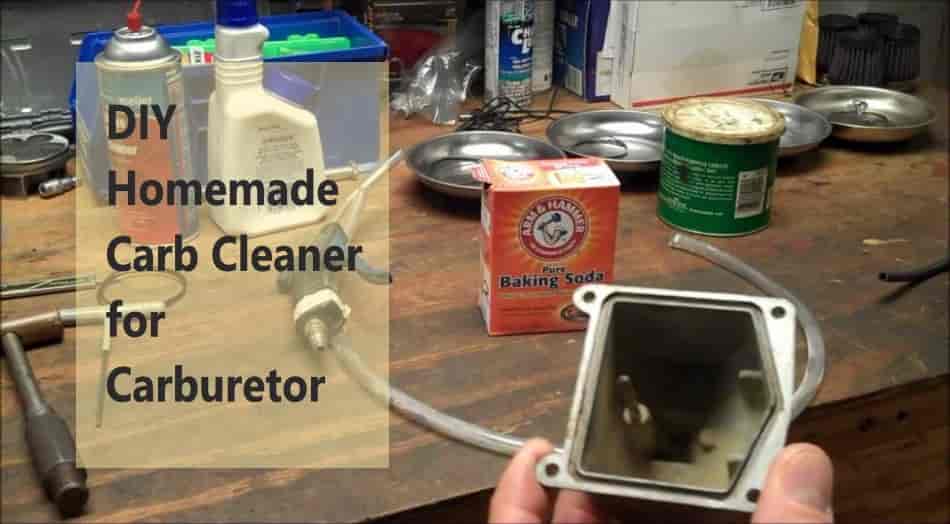
Baking Soda and Water
Baking soda is a mild abrasive that can help loosen deposits without damaging the carburetor’s delicate components.
- Preparation: Disconnect the carburetor from the engine. (Refer to your vehicle’s repair manual for specific instructions.)
- Disassembly: Carefully disassemble the carburetor, taking note of the location of each part. It’s helpful to take photos or draw diagrams to aid in reassembly.
- Cleaning Solution: Mix baking soda with warm water to create a paste. The consistency should be thick enough to adhere to the carburetor parts.
- Application: Apply the baking soda paste to all the carburetor parts, paying particular attention to the jets, passages, and float bowl.
- Scrubbing: Use a soft-bristled brush (an old toothbrush works well) to gently scrub away the deposits.
- Rinsing: Thoroughly rinse all the parts with clean water.
- Drying: Allow the parts to air dry completely or use compressed air to expedite the process.
- Reassembly: Carefully reassemble the carburetor, ensuring all parts are in their correct locations.
- Reinstallation: Reinstall the carburetor onto the engine.
Vinegar
Vinegar’s acidity can help dissolve varnish and other stubborn deposits. White vinegar is generally preferred.
- Preparation: Same as above (disconnect and disassemble the carburetor).
- Cleaning Solution: Submerge the carburetor parts in a container filled with white vinegar.
- Soaking: Allow the parts to soak for several hours or overnight, depending on the severity of the deposits.
- Scrubbing: After soaking, use a soft-bristled brush to scrub away any remaining deposits.
- Rinsing: Thoroughly rinse all the parts with clean water.
- Drying: Allow the parts to air dry completely or use compressed air.
- Reassembly: Carefully reassemble the carburetor.
- Reinstallation: Reinstall the carburetor onto the engine.
Lemon Juice
Similar to vinegar, lemon juice contains citric acid, which can also dissolve deposits. It’s a milder option than vinegar.
- Preparation: Same as above (disconnect and disassemble the carburetor).
- Cleaning Solution: Submerge the carburetor parts in a container filled with lemon juice.
- Soaking: Allow the parts to soak for several hours.
- Scrubbing: After soaking, use a soft-bristled brush to scrub away any remaining deposits.
- Rinsing: Thoroughly rinse all the parts with clean water.
- Drying: Allow the parts to air dry completely or use compressed air.
- Reassembly: Carefully reassemble the carburetor.
- Reinstallation: Reinstall the carburetor onto the engine.
Carburetor Cleaner Alternatives: Sea Foam and Berryman B-12 Chemtool
While the focus is on DIY carburetor cleaner solutions using household items, it’s worth mentioning commercially available alternatives that are often considered less harsh than dedicated carburetor cleaners. Sea Foam and Berryman B-12 Chemtool are two popular options that can be used as a DIY carburetor cleaner, although they are technically commercial products. They are often added to the fuel tank to help clean the carburetor while the engine is running. However, for a thorough cleaning, it’s still recommended to disassemble the carburetor and soak the parts in these solutions.
Important Safety Precautions
Working with carburetors and cleaning solutions requires caution. Always follow these safety guidelines:
- Work in a well-ventilated area: Some cleaning solutions can produce harmful fumes.
- Wear safety glasses and gloves: Protect your eyes and skin from contact with the cleaning solutions.
- Avoid open flames or sparks: Carburetors and fuel are highly flammable.
- Dispose of used cleaning solutions properly: Do not pour them down the drain. Check your local regulations for proper disposal methods.
- Consult your vehicle’s repair manual: This manual provides specific instructions for disconnecting, disassembling, and reassembling the carburetor.
Pros and Cons of DIY Carburetor Cleaner
Before you decide to use a DIY carburetor cleaner, weigh the advantages and disadvantages:
Pros:
- Cost-effective: Household ingredients are typically much cheaper than commercial carburetor cleaners.
- Readily available: You likely already have the necessary ingredients on hand.
- Environmentally friendly (in some cases): Some DIY carburetor cleaner options, like baking soda and water, are less harmful to the environment than harsh chemical cleaners.
Cons:
- Less effective for severe deposits: DIY carburetor cleaner solutions may not be strong enough to remove heavy varnish or carbon buildup.
- Time-consuming: The cleaning process can take several hours or even overnight.
- Requires mechanical skill: Disassembling and reassembling a carburetor can be challenging for those with limited mechanical experience.
- Potential for damage: Improper handling or the use of harsh abrasives can damage the carburetor’s delicate components.
When to Seek Professional Help
While a DIY carburetor cleaner can be effective for minor cleaning, there are times when professional help is necessary:
- Severe carburetor damage: If the carburetor is cracked, warped, or has other significant damage, it may need to be replaced.
- Complex carburetor design: Some carburetors are incredibly complex and require specialized tools and knowledge to disassemble and reassemble correctly.
- Persistent performance issues: If you’ve cleaned the carburetor yourself and are still experiencing performance problems, there may be underlying issues that require professional diagnosis and repair.
Conclusion: Is DIY Carburetor Cleaner Right for You?
A DIY carburetor cleaner can be a viable option for maintaining your engine’s performance and saving money. However, it’s crucial to carefully consider the pros and cons, follow safety precautions, and assess your own mechanical skills before attempting this task. If you’re comfortable working on engines and have the patience to follow the steps carefully, a DIY carburetor cleaner can be a rewarding experience. If you’re unsure, seeking professional help is always the best course of action.
Ultimately, the decision of whether to use a DIY carburetor cleaner depends on your individual circumstances and comfort level. By understanding the process, the risks, and the alternatives, you can make an informed choice that’s best for your engine and your wallet. Remember to always prioritize safety and consult your vehicle’s repair manual for specific instructions.
[See also: Carburetor Adjustment Guide]
[See also: Symptoms of a Dirty Carburetor]
[See also: How to Rebuild a Carburetor]
