Unveiling the Secrets of Acrylic Nails Liquid: A Comprehensive Guide
Acrylic nails have become a staple in the beauty industry, offering a durable and customizable solution for those seeking flawless manicures. Central to the application of acrylic nails is the acrylic nails liquid, also known as monomer. This chemical component, when combined with acrylic powder, initiates a polymerization process that results in the hardened acrylic nail. Understanding the nuances of acrylic nails liquid is crucial for both professional nail technicians and DIY enthusiasts aiming to achieve salon-quality results. This comprehensive guide delves into the various aspects of acrylic nails liquid, covering its composition, application techniques, safety precautions, and troubleshooting tips.
What is Acrylic Nails Liquid?
Acrylic nails liquid, or monomer, is a liquid acrylic product that acts as a catalyst in the creation of acrylic nails. It’s typically composed of ethyl methacrylate (EMA), a specific type of acrylic monomer known for its flexibility and durability. The liquid is mixed with acrylic powder (polymer) to form a workable bead that can be sculpted onto the natural nail or nail form. The chemical reaction causes the mixture to harden, creating a strong and long-lasting artificial nail. The quality of the acrylic nails liquid directly impacts the final outcome of the manicure, affecting its strength, color stability, and overall appearance.
Types of Acrylic Nails Liquid
While EMA-based monomers are the most common, different formulations exist, each offering unique characteristics:
- EMA Monomer: The industry standard, offering a good balance of strength and flexibility. It is generally considered safer than MMA.
- MMA Monomer: Methyl methacrylate (MMA) was previously used but is now largely discouraged due to its potential to cause allergic reactions, nail damage, and difficulty in removal. Its strong, unpleasant odor is also a deterrent.
- Odorless Monomer: Formulated to minimize the strong chemical smell associated with traditional acrylic liquids. While they reduce odor, they often have a slower setting time and may require more precise application.
- Colored Monomer: Some manufacturers offer monomers pre-tinted with color, which can help create vibrant and unique nail designs.
Essential Tools and Materials for Acrylic Nail Application
Achieving a professional-looking acrylic manicure requires more than just acrylic nails liquid. Here’s a list of essential tools and materials:
- Acrylic Powder (Polymer): Available in various colors and finishes, the powder reacts with the liquid to create the acrylic nail.
- Acrylic Brush: A specialized brush, typically made of kolinsky sable hair, used to pick up the acrylic bead and apply it to the nail.
- Dappen Dish: A small dish used to hold the acrylic nails liquid during application.
- Nail Forms or Tips: Used to extend the length of the natural nail.
- Nail Primer: Applied to the natural nail to improve adhesion and prevent lifting.
- Nail File and Buffer: Used to shape and smooth the acrylic nails.
- Cuticle Pusher and Nipper: For prepping the natural nail.
- Dust Brush: To remove filings and debris.
- Protective Gear: Gloves and a mask to protect against chemical exposure.
Step-by-Step Guide to Applying Acrylic Nails
Applying acrylic nails requires practice and precision. Here’s a general outline of the process:
- Prepare the Natural Nails: Push back and trim cuticles, gently buff the nail surface, and cleanse with alcohol.
- Apply Nail Primer: Apply a thin layer of nail primer to the natural nail and allow it to dry completely.
- Apply Nail Forms or Tips: Secure nail forms or adhere nail tips to the desired length and shape.
- Dip Brush into Liquid: Dip the acrylic brush into the acrylic nails liquid, ensuring the brush is saturated but not dripping.
- Pick Up Acrylic Powder: Gently touch the brush to the surface of the acrylic powder to pick up a small bead. The ratio of liquid to powder is crucial for a workable consistency.
- Apply Acrylic Bead to Nail: Place the bead onto the nail and gently sculpt it into the desired shape. Work quickly, as the acrylic will begin to harden.
- Repeat Steps 5 and 6: Apply additional beads of acrylic to build up the nail, ensuring a smooth and even surface.
- Allow Acrylic to Harden: Allow the acrylic to fully harden, which typically takes a few minutes.
- Shape and Refine: Use a nail file and buffer to shape and smooth the acrylic nails to the desired shape and finish.
- Apply Top Coat: Apply a top coat to seal the acrylic and add shine.
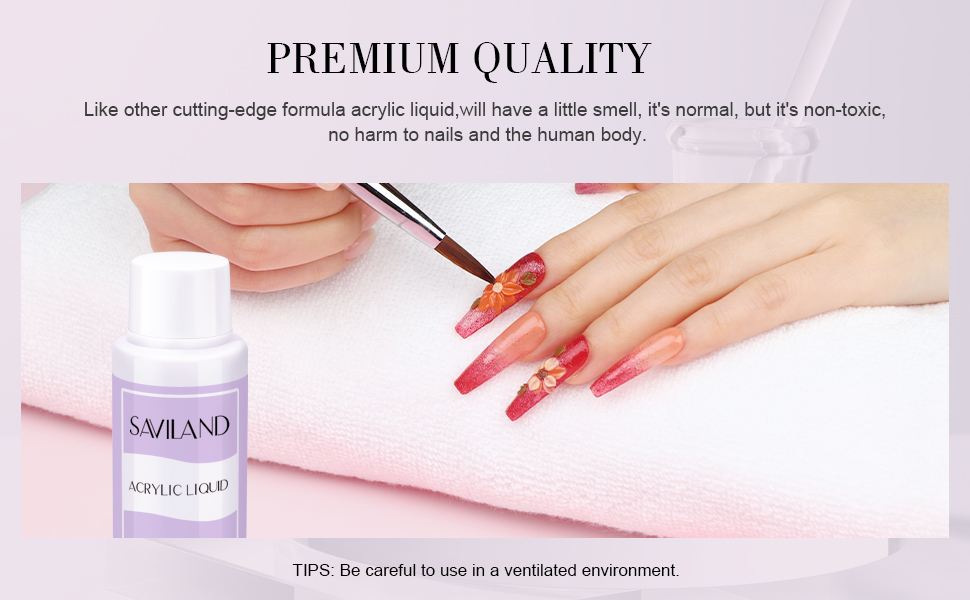
Safety Precautions When Using Acrylic Nails Liquid
Working with acrylic nails liquid involves exposure to chemicals, so it’s essential to prioritize safety:
- Ventilation: Always work in a well-ventilated area to minimize inhalation of fumes.
- Protective Gear: Wear gloves and a mask to protect your skin and respiratory system.
- Avoid Skin Contact: Minimize direct contact with the skin, as acrylic nails liquid can cause irritation or allergic reactions.
- Proper Storage: Store acrylic nails liquid in a cool, dark place, away from heat and direct sunlight. Keep out of reach of children.
- Read Instructions: Always read and follow the manufacturer’s instructions for the specific product you are using.
- Avoid MMA: Ensure that the acrylic nails liquid you are using is EMA-based and not MMA-based.
Troubleshooting Common Acrylic Nail Problems
Even with careful application, problems can arise. Here are some common issues and their solutions:
- Lifting: Caused by poor nail preparation, improper primer application, or using too much acrylic nails liquid. Ensure thorough nail preparation and proper product application.
- Bubbles: Often result from using a brush that is too wet or working too slowly. Use a drier brush and work quickly.
- Yellowing: Can occur due to exposure to sunlight or certain chemicals. Use a UV-resistant top coat and avoid exposure to harsh chemicals.
- Cracking: Typically caused by applying the acrylic too thinly or using a low-quality product. Apply the acrylic in thicker layers and use a reputable brand.
- Runny Acrylic: Usually a result of using too much acrylic nails liquid in the mix. Adjust the ratio of liquid to powder.
Choosing the Right Acrylic Nails Liquid
Selecting the right acrylic nails liquid is essential for achieving optimal results. Consider the following factors:
- Brand Reputation: Opt for reputable brands known for their quality and consistency.
- Ingredients: Ensure the liquid is EMA-based and free from harmful chemicals like MMA.
- Setting Time: Consider the setting time based on your skill level. Beginners may prefer a slower-setting liquid.
- Odor: If you are sensitive to strong odors, choose an odorless monomer.
- Reviews: Read online reviews to get insights from other users.
Proper Brush Care for Acrylic Nail Application
Maintaining your acrylic brush is crucial for its longevity and performance. Here are some tips:
- Clean After Each Use: Immediately after each use, clean the brush with brush cleaner or acrylic nails liquid to remove any remaining acrylic.
- Shape the Bristles: After cleaning, reshape the bristles to a point to maintain the brush’s shape.
- Store Properly: Store the brush horizontally or with the bristles pointing downwards to prevent the liquid from seeping into the handle.
- Avoid Acetone: Do not use acetone to clean your acrylic brush, as it can damage the bristles.
- Replace When Necessary: Over time, the brush may become worn or damaged. Replace it when the bristles lose their shape or become difficult to clean.
The Future of Acrylic Nails Liquid and Nail Technology
The field of nail technology is constantly evolving, with ongoing research and development leading to new and improved products. Expect to see advancements in acrylic nails liquid, including more eco-friendly formulations, enhanced color stability, and improved adhesion. Furthermore, innovations in application techniques and tools will continue to streamline the process and make it more accessible to both professionals and DIY enthusiasts. The demand for long-lasting and customizable nail solutions will continue to drive innovation in the acrylic nail industry. [See also: The Latest Trends in Nail Art Design]
Conclusion
Mastering the art of acrylic nails requires a thorough understanding of acrylic nails liquid. By selecting the right product, following proper application techniques, and prioritizing safety, you can achieve beautiful and durable acrylic nails. Whether you’re a seasoned nail technician or a beginner, this comprehensive guide provides valuable insights into the world of acrylic nails liquid. Remember to always prioritize safety and practice to refine your skills and achieve salon-quality results. The key to a perfect acrylic manicure lies in understanding the properties and proper usage of acrylic nails liquid. With practice and dedication, anyone can achieve stunning and long-lasting acrylic nails, showcasing their personal style and creativity. The versatility of acrylic nails liquid allows for endless possibilities in nail design, making it a popular choice for those seeking to express themselves through their manicures. Always ensure proper ventilation when working with acrylic nails liquid to protect your respiratory health. Investing in high-quality acrylic nails liquid will ultimately lead to better and more durable results. Understanding the chemistry behind acrylic nails liquid can further enhance your ability to create flawless acrylic nails. The proper ratio of acrylic nails liquid to powder is crucial for a smooth and even application. Remember to clean your brush thoroughly after each use with appropriate cleaner for acrylic nails liquid.
