Can Acrylic Paint Be Used on Wood? A Comprehensive Guide
Acrylic paint is a versatile medium favored by artists and crafters alike for its vibrant colors, quick drying time, and ease of use. A common question that arises, especially for those venturing into woodworking or DIY projects, is: Can acrylic paint be used on wood? The short answer is a resounding yes! However, understanding the nuances of preparing the wood, applying the paint, and sealing the finish are crucial for achieving professional and long-lasting results. This comprehensive guide will delve into the specifics, providing you with the knowledge and techniques necessary to successfully use acrylic paint on wood.
Understanding Acrylic Paint and Wood
Before diving into the application process, it’s important to understand the properties of both acrylic paint and wood. Acrylic paint is a water-based paint made from acrylic polymers. These polymers create a flexible and durable film when dry, making it suitable for various surfaces, including wood. Wood, on the other hand, is a porous and absorbent material. Its texture and grain vary depending on the type of wood, which can affect how the paint adheres and appears.
Benefits of Using Acrylic Paint on Wood
- Versatility: Acrylics can be used for a wide range of techniques, from detailed brushwork to broad washes.
- Durability: Once dry, acrylic paint forms a tough, water-resistant layer.
- Quick Drying Time: Acrylics dry relatively quickly, allowing for faster project completion.
- Easy Cleanup: Being water-based, acrylic paint is easy to clean up with soap and water.
- Color Variety: Acrylics are available in a vast array of colors and finishes, including matte, gloss, and metallic.
Potential Challenges
- Absorption: Wood’s porous nature can cause it to absorb paint unevenly, requiring multiple coats.
- Grain Show-Through: The wood grain may still be visible through the paint, which can be desired or undesirable depending on the project’s aesthetic.
- Cracking and Peeling: If the wood isn’t properly prepared or the paint isn’t sealed, it can lead to cracking or peeling over time.
Preparing the Wood Surface
Proper preparation is paramount for ensuring the acrylic paint adheres well and provides a smooth, even finish. Skipping this step can lead to disappointing results and potential problems down the line.
Sanding
Start by sanding the wood surface to create a smooth base. Use progressively finer grits of sandpaper. Begin with a coarser grit (e.g., 80-120) to remove any imperfections, such as splinters or rough patches. Then, move to a medium grit (e.g., 150-180) to further smooth the surface. Finally, use a fine grit (e.g., 220-320) for a final polish. Remember to sand with the grain of the wood to avoid scratching.
Cleaning
After sanding, thoroughly clean the wood surface to remove any dust or debris. Use a tack cloth or a damp cloth to wipe down the wood. Ensure the surface is completely dry before proceeding to the next step. Any remaining dust can interfere with paint adhesion and create a textured finish.
Priming
Priming is an essential step, especially when painting wood with acrylics. Primer seals the wood’s pores, preventing the paint from being absorbed excessively. It also provides a uniform surface for the paint to adhere to, resulting in better coverage and a more vibrant color. Choose a primer specifically designed for wood. Apply a thin, even coat of primer using a brush, roller, or spray gun. Allow the primer to dry completely according to the manufacturer’s instructions before proceeding.
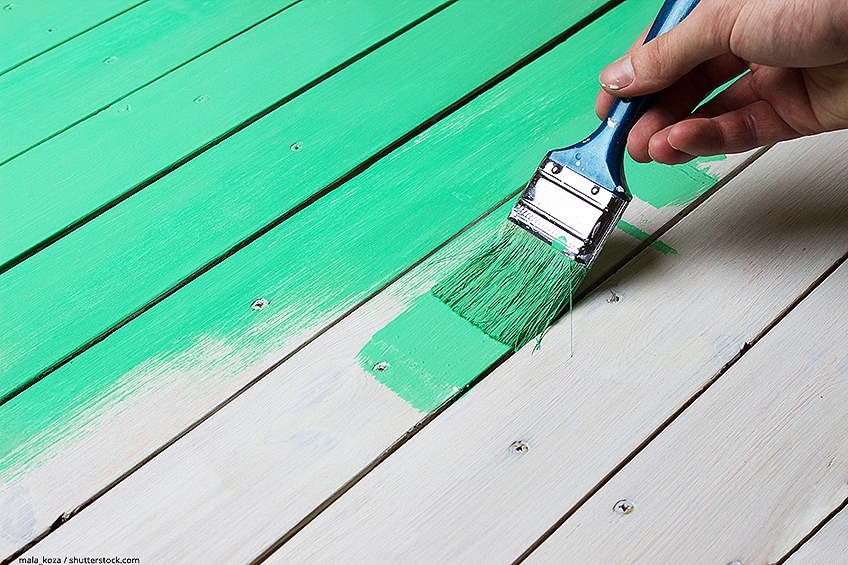
Applying Acrylic Paint to Wood
With the wood properly prepared, you can now begin applying the acrylic paint. Here are some tips for achieving the best results:
Choosing the Right Paint
While any acrylic paint can technically be used on wood, some are better suited than others. Look for paints that are specifically formulated for craft projects or that are labeled as suitable for use on wood. These paints often contain additives that improve adhesion and durability. Artist-grade acrylics also offer excellent pigment saturation and lightfastness.
Application Techniques
- Brushing: Use a high-quality brush with synthetic bristles for best results. Apply the paint in thin, even strokes, following the grain of the wood. Avoid applying too much paint at once, as this can lead to drips and uneven coverage.
- Rolling: A foam roller can be used to apply paint to larger, flat surfaces. Choose a roller with a nap that is appropriate for the texture of the wood. Apply the paint in smooth, even strokes, overlapping each stroke slightly.
- Spraying: Spraying acrylic paint can provide a smooth, even finish, especially on intricate or textured surfaces. Use an airbrush or a spray gun designed for acrylic paints. Thin the paint according to the manufacturer’s instructions and apply several thin coats, allowing each coat to dry before applying the next.
Number of Coats
Typically, two to three coats of acrylic paint are needed to achieve full coverage and a vibrant color. Allow each coat to dry completely before applying the next. Lightly sand between coats with fine-grit sandpaper (e.g., 320-400) to remove any imperfections and create a smoother surface for the next coat.
Sealing the Acrylic Paint Finish
Sealing the acrylic paint finish is crucial for protecting the paint from wear and tear, moisture, and UV damage. A sealant also enhances the paint’s durability and makes it easier to clean. [See also: Best Sealants for Acrylic Paint on Wood]
Types of Sealants
- Acrylic Sealers: These sealers are specifically designed for use with acrylic paints. They are water-based and provide a clear, durable finish.
- Polyurethane Sealers: Polyurethane sealers are oil-based and offer excellent protection against moisture and abrasion. However, they can sometimes yellow over time, which may affect the color of the paint.
- Varnish: Varnish provides a hard, durable finish that is resistant to scratches and chemicals. It is available in various sheens, including gloss, satin, and matte.
Application of Sealant
Apply the sealant using a brush, roller, or spray gun, following the manufacturer’s instructions. Apply thin, even coats, allowing each coat to dry completely before applying the next. Two to three coats of sealant are typically recommended for optimal protection. Lightly sand between coats with fine-grit sandpaper to remove any imperfections and create a smoother finish.
Troubleshooting Common Issues
Even with careful preparation and application, you may encounter some common issues when using acrylic paint on wood. Here are some tips for troubleshooting:
Paint Cracking or Peeling
This is often caused by inadequate preparation or using the wrong type of paint. Ensure the wood is properly sanded, cleaned, and primed before painting. Use a high-quality acrylic paint that is suitable for use on wood. Also, avoid applying too much paint at once, as this can lead to cracking as the paint dries.
Uneven Coverage
Uneven coverage can be caused by the wood absorbing the paint unevenly. Priming the wood before painting can help to prevent this. Also, apply multiple thin coats of paint rather than one thick coat.
Brush Strokes Visible
Visible brush strokes can be minimized by using a high-quality brush with synthetic bristles and applying the paint in thin, even strokes. You can also try thinning the paint slightly with water or a paint thinner. [See also: Tips for Smooth Acrylic Painting]
Safety Precautions
When working with acrylic paint and sealants, it’s important to take certain safety precautions:
- Ventilation: Work in a well-ventilated area to avoid inhaling fumes.
- Protective Gear: Wear gloves and eye protection to prevent skin and eye irritation.
- Proper Disposal: Dispose of paint and sealant waste properly according to local regulations.
Conclusion
So, can acrylic paint be used on wood? Absolutely! With proper preparation, application, and sealing, acrylic paint can be used to create beautiful and durable finishes on wood surfaces. By following the tips and techniques outlined in this guide, you can achieve professional-looking results and bring your woodworking and DIY projects to life. Remember to always prioritize safety and take your time to ensure each step is completed correctly. Happy painting!
Acrylic paint is a fantastic choice for many wood projects, offering versatility and vibrant color. Just remember the importance of preparation, proper application, and a good sealant. The success of your project depends on these factors.
Using acrylic paint on wood opens up a world of creative possibilities. Experiment with different colors, techniques, and finishes to achieve your desired look. With practice and patience, you’ll be amazed at what you can create.
Always remember to properly prepare the wood surface before applying acrylic paint. This includes sanding, cleaning, and priming. These steps are essential for ensuring that the paint adheres well and provides a smooth, even finish.
Choosing the right acrylic paint for your wood project is also important. Look for paints that are specifically formulated for craft projects or that are labeled as suitable for use on wood. These paints often contain additives that improve adhesion and durability.
Sealing the acrylic paint finish is crucial for protecting the paint from wear and tear, moisture, and UV damage. A sealant also enhances the paint’s durability and makes it easier to clean.
