How to Lay Landscaping Blocks: A Comprehensive Guide
Landscaping blocks are a versatile and aesthetically pleasing way to enhance your outdoor space. Whether you’re building a retaining wall, a garden border, or a patio, understanding how to lay landscaping blocks properly is crucial for a durable and attractive result. This comprehensive guide will walk you through each step of the process, ensuring your project is a success. We will explore everything from planning and preparation to the final touches, giving you the knowledge and confidence to tackle this DIY endeavor. Mastering how to lay landscaping blocks can significantly increase your home’s curb appeal and value.
Planning Your Landscaping Block Project
Before you even think about picking up a block, thorough planning is essential. This involves several key steps:
Define Your Project
What exactly are you building? Is it a simple garden border, a raised flower bed, a retaining wall, or a patio? The scale and complexity of your project will influence the materials you need and the techniques you’ll use. For example, building a small garden border requires less extensive preparation than constructing a retaining wall that needs to withstand significant soil pressure. Understanding the project’s purpose is fundamental to how to lay landscaping blocks effectively.
Measure and Calculate
Accurate measurements are crucial. Measure the length, width, and height of your desired structure. Use these measurements to calculate the number of blocks you’ll need. Remember to account for any cuts you’ll need to make around corners or obstacles. It’s always a good idea to order a few extra blocks to account for breakage or miscalculations. Proper measurement contributes significantly to how to lay landscaping blocks efficiently and accurately.
Check Local Regulations
Many municipalities have regulations regarding the height of retaining walls or the construction of patios. Before starting your project, check with your local building department to ensure you comply with all applicable codes. Ignoring these regulations can lead to costly fines or even the need to dismantle your work. Confirming compliance is a critical, often overlooked aspect of how to lay landscaping blocks professionally.
Design and Layout
Create a detailed design of your project. This can be a simple sketch or a more elaborate plan using design software. Consider the aesthetic appeal of your structure and how it will integrate with the surrounding landscape. Marking the layout on the ground with stakes and string is a good way to visualize the finished product before you begin construction. A well-thought-out design is paramount to how to lay landscaping blocks in a visually appealing way.
Gathering Your Tools and Materials
Having the right tools and materials on hand will make the job much easier and more efficient. Here’s a list of essentials:
- Landscaping Blocks: Choose blocks that are appropriate for your project. Consider the size, color, and texture.
- Base Material: Crushed gravel or compacted road base is essential for creating a stable foundation.
- Sand: Used for leveling the blocks.
- Level: A spirit level or laser level to ensure the blocks are perfectly level.
- Shovel: For digging and moving materials.
- Tamper: For compacting the base material.
- Rubber Mallet: For gently tapping the blocks into place.
- Measuring Tape: For accurate measurements.
- Gloves: To protect your hands.
- Safety Glasses: To protect your eyes.
- Circular Saw with Masonry Blade: For cutting blocks (if necessary).
Preparing the Foundation
A solid foundation is the key to a long-lasting landscaping block structure. This step is perhaps the most critical in ensuring how to lay landscaping blocks properly. Here’s how to prepare it:
Excavation
Dig out the area where you’ll be laying the blocks. The depth of the excavation will depend on the height of your structure and the type of soil. As a general rule, excavate to a depth of at least 6 inches for small projects and up to 12 inches or more for larger retaining walls. Remember to slope the excavation slightly away from the structure to allow for drainage.
Base Layer
Pour a layer of crushed gravel or compacted road base into the excavation. This layer provides a stable and well-draining foundation. Use a tamper to compact the base material thoroughly. This compaction is crucial for preventing settling and ensuring the longevity of your structure. The base layer is fundamental to how to lay landscaping blocks in a stable and durable manner.
Leveling Sand
Add a layer of leveling sand on top of the compacted base material. This sand will help you fine-tune the level of each block. Use a level to ensure the sand is perfectly flat and even. This step is critical for achieving a professional-looking finish. The leveling sand ensures that how to lay landscaping blocks results in a visually appealing and structurally sound outcome.
Laying the Landscaping Blocks
Now comes the exciting part – actually laying the blocks! Here’s a step-by-step guide:
First Course
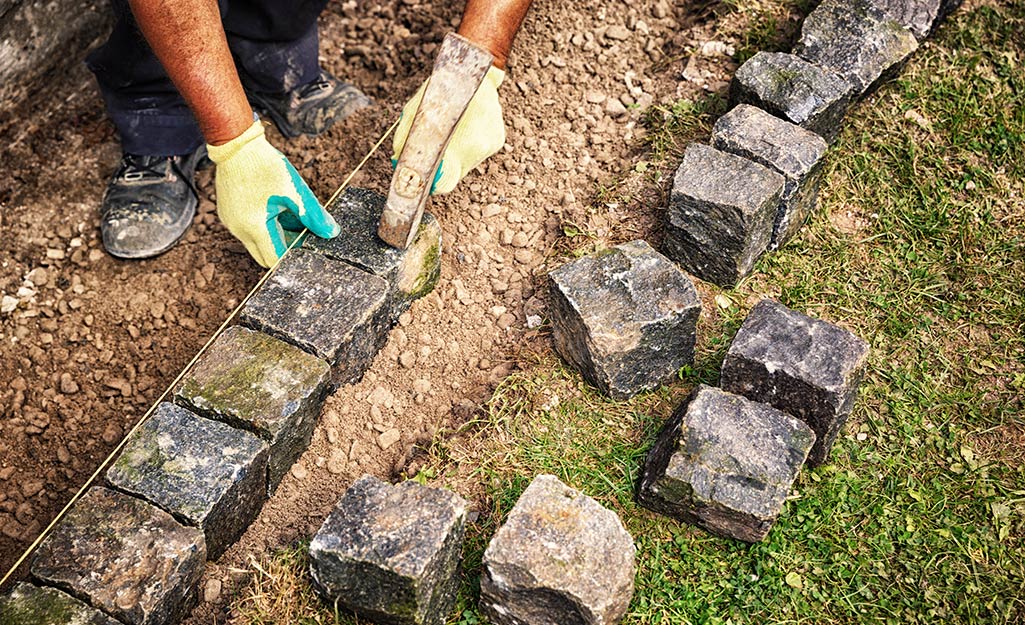
Start by laying the first course of blocks. This is the most important course, as it will determine the level and alignment of the entire structure. Use a level to ensure each block is perfectly level both horizontally and vertically. Adjust the sand beneath the blocks as needed to achieve a level surface. Precision in the first course is key to how to lay landscaping blocks successfully.
Subsequent Courses
Once the first course is complete, continue laying subsequent courses, staggering the joints between the blocks for added strength and stability. Use a level to check the level of each course as you go. If you’re building a retaining wall, consider using a block adhesive to bond the blocks together. This will provide extra strength and prevent the wall from shifting over time. Proper staggering and leveling are essential to how to lay landscaping blocks to create a strong and visually pleasing structure.
Cutting Blocks
In some cases, you may need to cut blocks to fit around corners or obstacles. Use a circular saw with a masonry blade to make clean, precise cuts. Always wear safety glasses and a dust mask when cutting blocks. Accurate cutting is a necessary skill for how to lay landscaping blocks in complex designs.
Backfilling (for Retaining Walls)
If you’re building a retaining wall, you’ll need to backfill behind the wall with gravel or crushed stone. This will help to drain water away from the wall and prevent hydrostatic pressure from building up. Install a perforated drain pipe at the base of the wall to further improve drainage. Proper backfilling and drainage are crucial for the long-term stability of retaining walls and are essential considerations in how to lay landscaping blocks for such projects.
Finishing Touches
Once you’ve laid all the blocks, it’s time to add the finishing touches.
Capping (if applicable)
If you’re building a retaining wall or a raised flower bed, you may want to add a capping course of blocks. This will give the structure a finished look and provide a comfortable surface to sit on. Choose capping blocks that complement the color and texture of the main blocks.
Sealing (optional)
Consider sealing the blocks with a masonry sealer to protect them from the elements and prevent staining. This is especially important in areas with harsh weather conditions. Sealing enhances the longevity of your project and protects your investment in learning how to lay landscaping blocks.
Landscaping
Complete your project by adding landscaping around the blocks. Plant flowers, shrubs, or trees to create a beautiful and inviting outdoor space. Consider using mulch or decorative gravel to enhance the aesthetic appeal. Landscaping adds the final touch to your project, showcasing your skills in how to lay landscaping blocks.
Troubleshooting Common Issues
Even with careful planning and execution, you may encounter some challenges. Here are a few common issues and how to address them:
- Blocks are not level: Use a level to identify the high and low spots. Adjust the sand beneath the blocks as needed.
- Blocks are shifting: Ensure the base material is properly compacted. Consider using a block adhesive to bond the blocks together.
- Water is pooling behind the retaining wall: Ensure proper drainage. Install a perforated drain pipe at the base of the wall and backfill with gravel or crushed stone.
Conclusion
Laying landscaping blocks can be a rewarding DIY project that adds beauty and value to your home. By following these steps and taking your time, you can create a stunning outdoor space that you’ll enjoy for years to come. Remember that careful planning, a solid foundation, and attention to detail are the keys to success. Mastering how to lay landscaping blocks is a valuable skill that empowers you to transform your outdoor spaces. Don’t be afraid to start small and gradually tackle more complex projects as you gain experience. Happy landscaping!
[See also: Building a Retaining Wall: A Step-by-Step Guide]
[See also: Choosing the Right Landscaping Blocks for Your Project]
[See also: Patio Design Ideas for Small Backyards]
