Under Sink Leak: A Comprehensive Guide to Identification, Repair, and Prevention
Discovering an under sink leak can be a homeowner’s nightmare. From the incessant drip-drip-drip to the potential for water damage, a seemingly small leak can quickly escalate into a costly problem. This comprehensive guide provides a detailed look at identifying, repairing, and preventing under sink leaks, empowering you to tackle these issues head-on.
Understanding the Common Causes of Under Sink Leaks
Before you can fix an under sink leak, it’s crucial to understand its origin. Several factors can contribute to these leaks, ranging from simple wear and tear to more complex plumbing issues. Here are some of the most common culprits:
- Loose Connections: The most frequent cause of under sink leaks is simply loose connections. Over time, vibrations and temperature fluctuations can loosen the nuts and fittings on supply lines and drain pipes.
- Worn-Out Washers and O-Rings: These small rubber components provide a watertight seal between pipes and fittings. As they age, they can become brittle, cracked, or compressed, leading to leaks.
- Corroded Pipes: Especially in older homes, pipes can corrode over time due to mineral buildup or chemical reactions with the water. Corrosion weakens the pipe walls, eventually leading to pinhole leaks.
- Clogged Drains: A clogged drain can cause water to back up into the sink and overflow through the drain connections. The increased pressure can also stress the pipes and fittings, leading to leaks.
- Damaged Faucet: The faucet itself can be the source of the leak. Worn-out cartridges, O-rings, or valve seats can cause water to drip from the spout or leak around the base of the faucet.
- Supply Line Issues: The supply lines that connect the faucet to the water supply can also develop leaks. These lines can become kinked, cracked, or corroded, especially if they are made of flexible plastic or rubber.
- Garbage Disposal Problems: If you have a garbage disposal, it can be a source of under sink leaks. Leaks can occur around the disposal’s mounting flange or from the disposal unit itself due to internal damage.
Identifying the Source of the Leak
Pinpointing the exact source of an under sink leak is the first step in resolving the problem. Here’s a systematic approach to identifying the leak:
- Clear the Area: Remove all items from under the sink to provide a clear view of the plumbing.
- Dry the Area: Use a towel to dry all the pipes, fittings, and the surrounding area. This will make it easier to spot the leak.
- Run the Water: Turn on the faucet and let the water run for a few minutes. Observe carefully for any signs of leaking.
- Check the Connections: Feel around the connections between the pipes and fittings. If you feel moisture, tighten the connections with a wrench. Be careful not to overtighten, as this can damage the pipes.
- Inspect the Washers and O-Rings: If the leak is coming from a connection, disassemble the connection and inspect the washers and O-rings. Replace any that are cracked, worn, or damaged.
- Examine the Pipes: Look for signs of corrosion, cracks, or pinholes in the pipes. If you find any damage, the pipes will need to be repaired or replaced.
- Check the Faucet: Inspect the faucet for leaks around the spout, base, or handles. If the faucet is leaking, you may need to replace the cartridges, O-rings, or the entire faucet.
- Test the Garbage Disposal: If you have a garbage disposal, run it and check for leaks around the mounting flange or from the disposal unit itself.
Repairing Common Under Sink Leaks: A Step-by-Step Guide
Once you’ve identified the source of the under sink leak, you can begin the repair process. Here are step-by-step instructions for fixing some of the most common types of leaks:
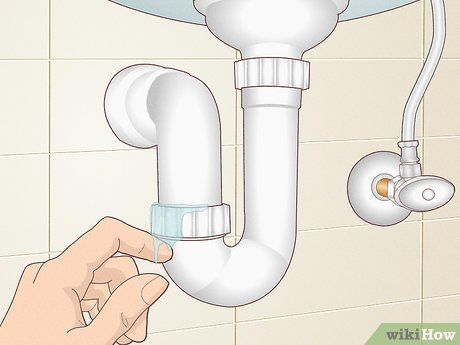
Tightening Loose Connections
This is often the easiest and most common fix for an under sink leak.
- Turn Off the Water: Locate the shut-off valves under the sink and turn them off. If there are no shut-off valves, you’ll need to turn off the main water supply to your house.
- Dry the Connection: Use a towel to dry the connection that is leaking.
- Tighten the Nut: Use a wrench to gently tighten the nut connecting the pipes. Be careful not to overtighten, as this can damage the pipes or fittings.
- Turn On the Water: Slowly turn the water back on and check for leaks. If the leak persists, try tightening the nut a little more.
Replacing Washers and O-Rings
If tightening the connections doesn’t stop the leak, you may need to replace the washers or O-rings.
- Turn Off the Water: Turn off the water supply to the faucet.
- Disassemble the Connection: Use a wrench to carefully disassemble the connection that is leaking.
- Remove the Old Washer or O-Ring: Remove the old washer or O-ring from the connection.
- Install the New Washer or O-Ring: Install a new washer or O-ring of the same size and type.
- Reassemble the Connection: Carefully reassemble the connection and tighten the nut with a wrench.
- Turn On the Water: Slowly turn the water back on and check for leaks.
Repairing Corroded Pipes
Repairing corroded pipes can be a more complex task, depending on the extent of the damage. In some cases, you may be able to patch the pipe with epoxy or a pipe repair clamp. However, if the corrosion is severe, you may need to replace the entire section of pipe.
- Turn Off the Water: Turn off the water supply to the affected pipe.
- Cut Out the Damaged Section: Use a pipe cutter to cut out the corroded section of pipe.
- Prepare the New Pipe: Clean and prepare the ends of the new pipe section.
- Connect the New Pipe: Use pipe fittings and solder or compression fittings to connect the new pipe section to the existing pipes.
- Turn On the Water: Slowly turn the water back on and check for leaks.
Addressing Faucet Leaks
Faucet leaks can often be resolved by replacing worn-out cartridges, O-rings, or valve seats. [See also: How to Replace a Faucet Cartridge] The specific repair steps will vary depending on the type of faucet you have. Consult the manufacturer’s instructions or a plumbing professional for guidance.
Garbage Disposal Leaks
Leaks from the garbage disposal can stem from a loose mounting flange or internal damage. Tightening the mounting flange might resolve the issue. If the leak persists, the disposal unit may need replacement. [See also: Garbage Disposal Troubleshooting Guide]
Preventing Future Under Sink Leaks
Prevention is always better than cure. Here are some tips to help prevent future under sink leaks:
- Regular Inspections: Periodically inspect the pipes, connections, and fittings under your sink for any signs of leaks or corrosion.
- Tighten Connections Regularly: Use a wrench to tighten the connections every few months.
- Replace Worn Parts: Replace worn-out washers, O-rings, and supply lines as needed.
- Avoid Harsh Chemicals: Avoid pouring harsh chemicals down the drain, as they can corrode the pipes.
- Flush the Drain: Flush the drain with hot water regularly to prevent clogs.
- Properly Dispose of Grease: Never pour grease down the drain, as it can solidify and cause clogs.
- Install a Water Leak Detector: Consider installing a water leak detector under your sink to alert you to any leaks before they cause significant damage.
When to Call a Professional Plumber
While many under sink leaks can be repaired by a homeowner, some situations require the expertise of a professional plumber. Call a plumber if:
- You are unable to identify the source of the leak.
- The leak is coming from a pipe that is severely corroded or damaged.
- You are uncomfortable working with plumbing.
- You have tried to repair the leak yourself, but it persists.
Ignoring an under sink leak can lead to significant water damage, mold growth, and costly repairs. By understanding the common causes of these leaks, knowing how to identify the source, and following the repair steps outlined in this guide, you can effectively address most under sink leaks and protect your home from water damage. Remember, regular maintenance and prompt attention to even minor leaks can save you time, money, and stress in the long run. It’s also important to understand the signs of water damage early to prevent further damage. [See also: Early Signs of Water Damage]
